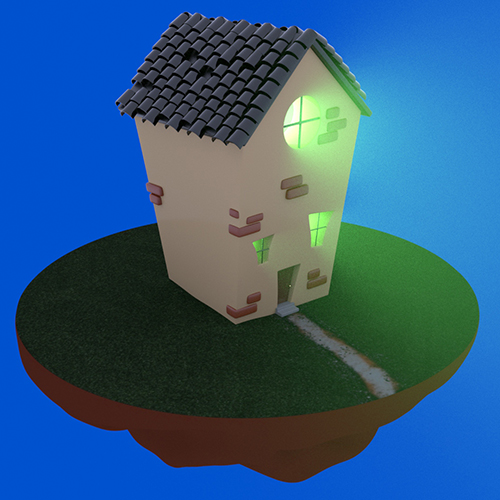
3D Stylized House
I really am trying to dedicate a portion of my evenings to honing my 3D skills. I have a long, long way to go and so very much to learn, but I genuinely enjoy the process of improving myself as a modeler. So, I decided to try my hand at making a small, stylized house environment where I played with Arnold render settings and attempted to make a significant project in a short period of time. The goal was to have a completed product by the end of the night while I was doing laundry.

I started with the house itself. I modeled everything carefully, but I also modeled it as quickly as I could.While I was going so quickly, I wanted to make sure that I still followed some basic rules.
- Maintain that every polygon used is a 4-sides polygon.
- Make clean and effective UV layouts.
- Try something new.
I succeeded at maintaining 4-sided polygons. Sometimes it was a pain, but I actually enjoy figuring out edge flow that supports 4-sided polygons. It is like a massive puzzle how 3D models fit together. It was a bit of a pain around the house windows due to their abnormal shape, but I found a way to maintain the goal.

UVing is definitely one of my least favorite aspects of modeling, but when it is done right it can make or break a model’s final presentation. So, I sucked it up and went for clean UVs with as little seams as possible. It was definitely a pain, but I was rather proud of how quickly I managed to generate substantial UV layouts. Thankfully the house is a lot of simple geometric shapes, but the process was still smooth which is exciting since UVs are an area I really want to improve on for speed and effectiveness.
The new thing I wanted to try was atmospheric lighting with Arnold. I’ve never really played too much with lights in Maya and figured this might be a good time for me to do so. I discovered some really neat sub-menus and found a tutorial that told me a bit of what some of the attributes are that can affect atmospheric lighting. I was able to generate the desired effect with the windows and their glowing lights. I was pleased with the result and intend on using the lighting system more in the future for sure.

I did everything while recording, too. The time lapse is a bit messy but generally shows my process from start to finish. The project itself took about 3.5 hours and I am glad I gave it a shot! I hope to do more personal/fun projects soon.
